DACA Passport Photo
Get the perfect biometric DACA passport pictures with guaranteed acceptance in seconds!
100% Compliance Guaranteed
3 Sec Processing Time
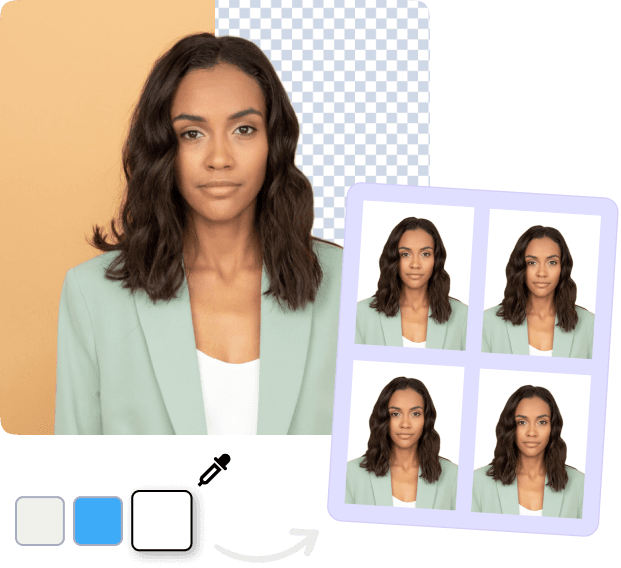
How to get instant photos online?
With our online DACA passport photo tool, you can get a biometric photo for your passport in less than 3 minutes.

Capture or upload your photo
It's super simple - take a selfie or upload a photo, and let our AI tool take care of the rest.

AI processes the image
Our AI tool will remove any unwanted background and resize your photo to the official passport photo dimensions.

AI photo verification
The AI tool will carry additional checks on the photo to make it compliant and ready for submission.
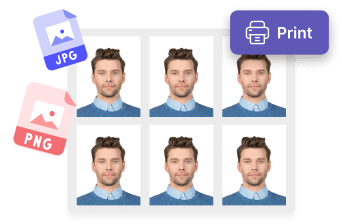
Get digital or print photos
Get your biometric photos in digital copy or have the printouts delivered to your doorstep within a few days.
How to take a clear photo?
Have you ever wondered how to take the perfect passport photo? No need to look further; these instructions will help you achieve biometric DACA passport photos in minutes.
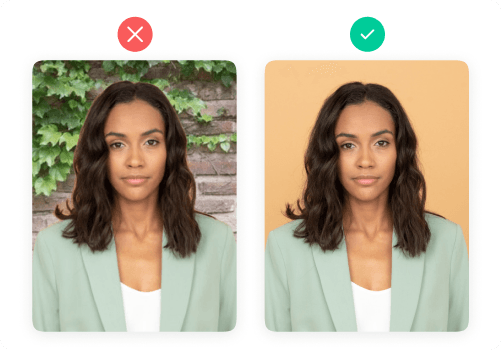
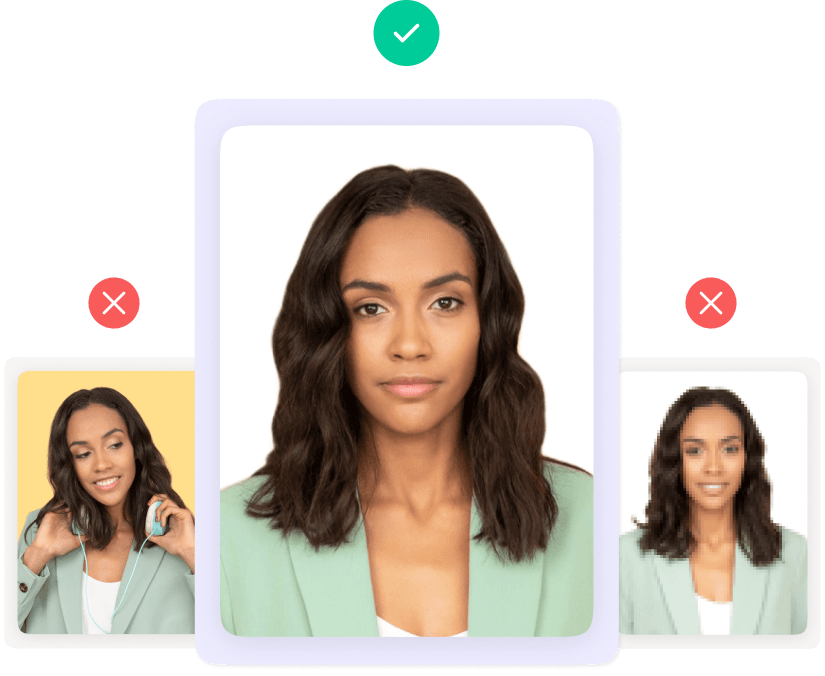
Use a plain background
Use a plain background with no objects behind your back. Stand at least 2m away from the background to avoid shadows behind you.
Keep your posture straight
Maintain a straight posture and fit your head, shoulders, and upper body into the photo. Remove your glasses before taking the picture.
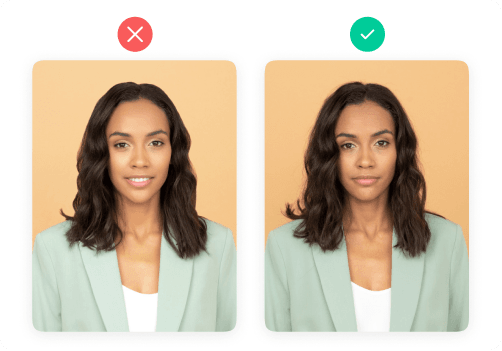
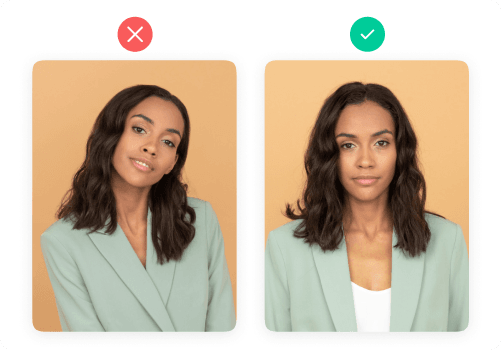
Maintain a neutral facial expression
Make sure your whole face is visible. Keep your hair away from your face and look straight at the camera with a plain expression.
Basic Passport Photo Guidelines
- Glasses
- Smiling
- Image retouching
- Wearing uniform and hat
DACA passport photo requirements
What is the passport photo size at DACA?
The standard DACA passport picture size is 2 x 2 inches (5.08 by 5.08 cm) with plain white background. DACA stands for Deferred Action for Childhood Arrivals.
While there is no information on the DACA passport photo cost, if you submit your renewal application, you will have to pay $495, which accounts for the following things:
- Your employment authorization or work permit fee is $410
- For application processing, biometrics, and photos, you will pay $85
Passport-size photos at DACA follow the requirements mentioned on the official portal of the U.S. Department of State. While submitting your application for DACA, tick all the boxes needed for a smooth, error-free process.
Remember: DACA is not responsible for accepting your passport picture, as the authority of the rejection and acceptance is only under the discretion of the U.S. passport office. However, taking a passport-size photo at DACA is a good choice if you don’t have the equipment or experience to do it alone at home.
What are the basic DACA passport photo requirements?
The requirements for a passport photo at DACA are mentioned below:
- The photo's background must be plain white without any texture or print. Make sure there are no shadows in the background, either.
- The measurements of passport-size photos at DACA should be precisely 2” by 2”. And the only acceptable format is JPEG.
- All applicants must wear minimal makeup, semi-formal clothes, and no vibrant colors.
- Take off any accessory that covers the face (sun shades, glasses, caps, etc.).
- It is acceptable to wear headscarves or other religious belongings for either religious or medical reasons. However, you should declare the cause in a signed letter and submit it to the passport office.
Note: The U.S. State Department decides these requirements.
Can I print passport photos at DACA?
Yes, you can print passport photos at DACA because it provides printing and photoshoot facilities. Here is how you can print passport photos at DACA:
- Find a nearby DACA passport-size photo location using Google Maps.
- After you have taken your photo, convert it into a passport photo using an online editing tool.
- Transfer the picture to any portable device and take it to the nearest DACA location in your state.
- Ask the staff at DACA to print your photo, and it will take them a few minutes to do so.
DACA passport photo locations near me
As per official sources, DACA offices are present in fifteen states, including Arkansas, California, Florida, Illinois, Maine, Minnesota, Nebraska, Nevada, New Jersey, New York, Oregon, South Dakota, Utah, West Virginia, and Wyoming.
You can also see the locations offering passport photo services on their website. Besides that, you can manually search the nearest DACA passport photo store locations on Google.
The timings of the offices can vary from city to city. However, the regular operating hours are usually from 8 AM to 10 PM.
If DACA is outside your state, you can visit retail centers, pharmacies, post offices, and photo studios to get your passport photos. Some of the most popular passport photo locations are CVS Health, Costco, Walgreens, Walmart, FedEx, and USPS.
How to take a passport photo at home using a phone?
Nowadays, taking passport photos at home is easy and quick. You only need a plain white background and a phone with a functional camera. Follow these steps afterward:
- Find a clean white wall to stand in front of. If you don’t have adequate space with a white wall, you can also find a white ironed sheet and pin it up.
- When getting ready, wear your semi-formal/formal attire. Keep your makeup and accessories minimal. Wear your hair so that your face and shoulders are visible.
- Remove any accessories that hide or cover your face in any way unless it is for religious or medical reasons. In case of medical reasons, attach a signed document to declare the reason.
- Set up your camera on a tripod, phone, or selfie stick. Make sure the frame captures you from head to shoulders.
- Check and adjust the lighting so that it correctly shows your face and does not cause shadows that may deteriorate the quality of your passport picture.
- Make sure not to use any filters on your photo. As mentioned, capturing your picture in your most natural state is crucial.
- Set an appropriate timer and pose for the picture. You can take as many as you need until you are comfortable with what you have.
Most places where you can get your passport photos taken and printed follow the same basic rules laid out by the U.S. Department of State’s official website.

A Better Alternative to DACA Passport Photos
Say goodbye to expensive and time-consuming passport photo services. With Pixelied's online tool, you can easily take high-quality passport pictures from the comfort of your home. Our user-friendly platform provides unlimited retakes to ensure complete satisfaction before finalizing your perfect image. Upgrade your passport photo experience with Pixelied today.
Frequently Asked Questions
Yes, DACA takes passport photos. They follow all guidelines and regulations the U.S. Department of State sets to provide you with your passport photos in minimal time. From taking your picture to printing them, they have you covered. And on a side note, the DACA passport photo price is unavailable on their website.
To print multiple passport photos on one page, you can use photo editing software or free online tools to resize and arrange your photo on a new document that matches your printer and paper size. Once you have created the layout, you can print the page and cut out each image following the guidelines for passport photos. This method can help you save time and money while meeting the necessary standards for your passport application.
Yes, a new picture is recommended and needed with your DACA renewal, even if your appearance has stayed the same. You can take the photo on your phone/camera, or the DACA office can help you take the images following the official U.S. Department of State guidelines.
The renewal takes about 120 days. Sometimes processing can vary according to the Department of State. If you are in a rush, it can also take 3 to 5 weeks after paying an extra fee for quick processing.