USCIS Passport Photo
Get the perfect biometric USCIS photo online with guaranteed acceptance in seconds!
100% Compliance Guaranteed
3 Sec Processing Time
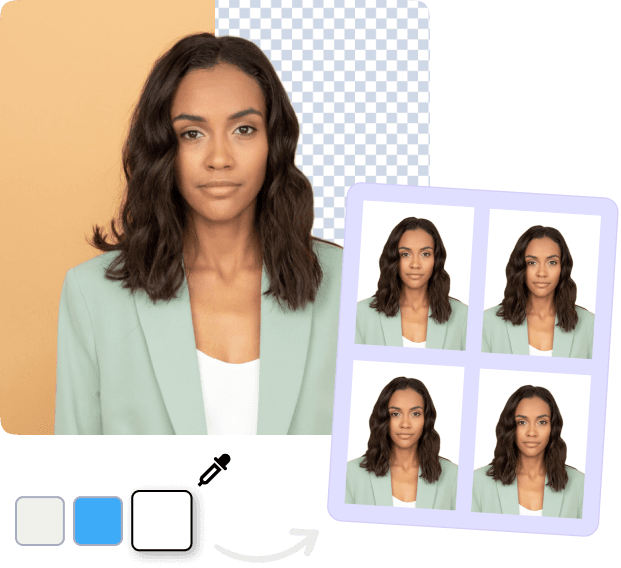
How to get instant photos online?
With our online passport photo tool, you can get a biometric photo for your passport in less than 3 minutes.

Capture or upload your photo
It's super simple - take a selfie or upload a photo, and let our AI tool take care of the rest.
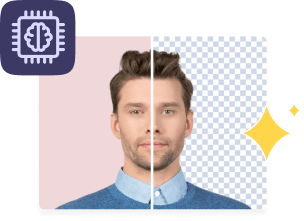
AI processes the image
Our AI tool will remove any unwanted background and resize your photo to the official passport photo dimensions.

AI photo verification
The AI tool will carry additional checks on the photo to make it compliant and ready for submission.
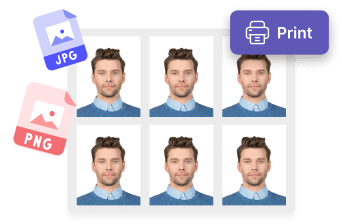
Get digital or print photos
Get your biometric photos in digital copy or have the printouts delivered to your doorstep within a few days.
How to take a clear photo?
Have you ever wondered how to take the perfect passport photo? No need to look further; these instructions will help you achieve biometric passport photos in minutes.
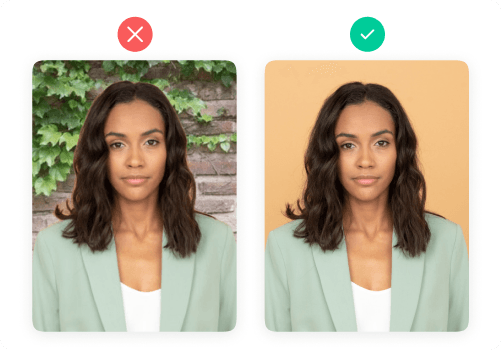
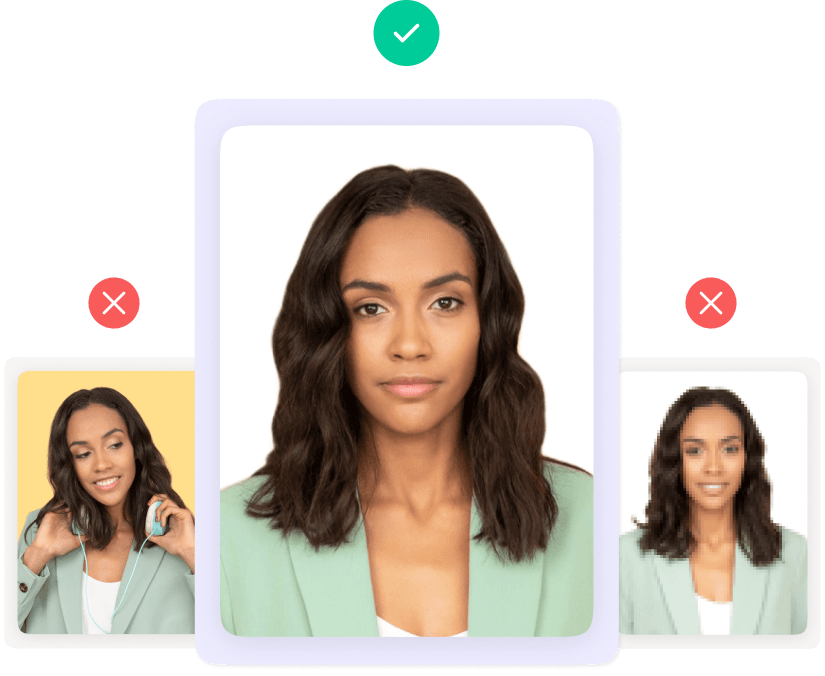
Use a plain background
Use a plain background with no objects behind your back. Stand at least 2m away from the background to avoid shadows behind you.
Keep your posture straight
Maintain a straight posture and fit your head, shoulders, and upper body into the photo. Remove your glasses before taking the picture.
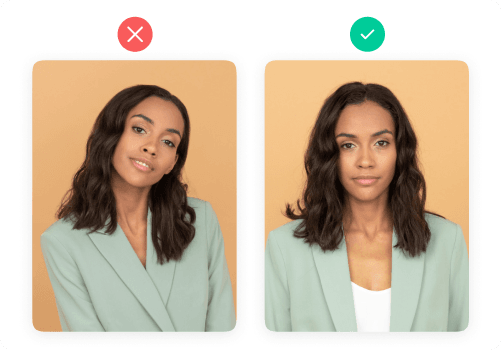
Maintain a neutral facial expression
Make sure your whole face is visible. Keep your hair away from your face and look straight at the camera with a plain expression.
Basic Passport Photo Guidelines
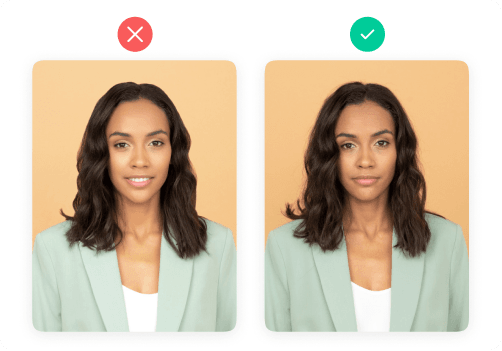
- Glasses
- Smiling
- Image retouching
- Wearing uniform and hat
All About USCIS Picture Requirements
U.S. Citizenship Application: Overview
U.S. Citizenship and Immigration Services (USCIS) is an agency that administers lawful immigration to the U.S. You can apply for citizenship by Naturalization. You can learn how to apply for naturalization, what documents are needed, the fee-paying procedures, and the expected processing time for your application below:
How to apply at USCIS
You can apply to USCIS online; here’s how:
- Go to the USCIS official website.
- Select Forms and choose Naturalization.
- Now Click on File Online. You need to create an account using email and then start filling out the application form for US citizenship.
- Fill in all the details required to proceed further. Complete your application by providing accurate personal information.
- Once done, review it and submit your citizenship application.
Documents Required
To submit an N-400 application, the applicant must send the following documents with the Naturalization application.
- Photographs: If you are not a US Resident, send two identical color photos with your name and A-number (Alien Registration Number) written on the backside of the pictures with a pencil.
- Permanent Resident Card: Photocopy of your Permanent Resident Card (both front and back side)(Alien Registration Card/ Green Card). In case your card is lost, you can submit a photocopy of the receipt for the I-90 Form.
- Money Order / Check: You must submit a Money Order/Check for Naturalization Application and Biometric Fee. Mention your A-Number on the backside of the money order or check. A credit card payment option is also available.
- Legal Marital Status Document: Attach a copy of the document for the present Legal Marital Status. Submit your current marriage certificate, divorce papers, annulment decree, and death certificate (in case of a former spouse’s death).
- Military Service Evidence: If the applicant has ever served in the US Military, they must provide a Discharge Certificate from Active Duty and DD form 214. If serving currently, then give a copy of Official Military orders. If you are a current member of the US Armed Forces, you must attach certified Form N-426, and in case you are separated, provide an uncertified Form N-426. You can also get a detailed insight into the requirements for Military service documents online.
Naturalization Fees
The application fee for naturalization is $725. The breakup of the fee is as follows:
- Standard Fee for Naturalization Application= $640
- Biometric Service Fee = $85
However, if your age is above 75 years, then you only have to pay a standard fee (i.e., $640). There is no refund policy by USCIS.
Processing Time
The processing time for your application can be calculated by following these steps:
- You can check case processing time online.
- Once the link opens, select the Form you have applied for, i.e., N-400 | Application for Naturalization.
- Choose the Form Category.
- Now select the Field Office or Service Center.
- Click on Get Processing Time.
The result will show an average processing time based on 80% of the cases. The usual time range for most cases is between 8.5 and 10 months.
What is the USCIS Passport Photo Size and Dimensions?
The photo size and dimension of the USCIS passport photo must be met to avoid rejection. The correct photo size, head, and eye dimensions are given below:
- Photo Size: The size of the USCIS passport size photograph is 2x2 inches, with the head centered in the frame. If you’re applying for a green card from abroad using Form DS-260, you must provide two identical photos at your immigrant visa interview.
- Head Size in Photo: The size of the head in the USCIS photos should measure between 1 inch to 1 3/8 inch ( i.e., 25 – 35 mm) from the top of the head to the bottom of the chin.
- Eye Dimensions: The eye level in the USCIS passport-size photo should be 1 1/8 – 1 3/8 inch (28 mm to 35 mm).
What are the USCIS Passport Photo Requirements?
The applicant must follow all the green card photo requirements while taking a picture:
Photo Dimensions
- The size of the USCIS passport photo is 2 by 2 inches.
- The head size in the photo should be between 1 – 1 3/8 inches.
- It should be taken within the last six months to reflect your current appearance.
Head Position
- Position the camera slightly above your hair to the middle of your chest. It will keep your head centered in the frame.
- Avoid taking a selfie as they have the wrong head position and dimensions.
Face
- The face in the passport photograph should cover 50% of the picture area.
- The applicant must maintain a natural facial expression for taking photographs.
- Don’t use outdated or old photos.
- Take photos with a full-face view. Capture the front view with both eyes fully opened and directed toward the camera.
- Facial piercings or tattoos are allowed as long as they do not hide your facial features.
- Eyeglasses are not allowed in visa photos, with limited exceptions, such as instances where, for medical reasons, they cannot be removed. For example, an exception may be granted if an applicant has recently undergone ocular surgery and must wear eyeglasses to protect their eyes.
Background & Shadows
- The background color in the photo can be white or off-white.
- There should be no shadows on the face or the background.
Head Coverings/Hats/Veils
- Applicants can wear head coverings or hats only for religious purposes. However, the face must be fully visible even in such a case.
- Headgears are not permissible if worn for any reason other than religious beliefs. Likewise, the applicant cannot use any tribal or national costumes.
- Taking photos wearing either airline, camouflage attire, or even personnel hats is prohibited except for religious clothing that is worn daily.
- Using a traditional facemask or veil that hides one’s identification is prohibited.
- Wireless hands-free devices, headphones, sunglasses, or other electronic devices are not acceptable.
Digital Photos
- The digital pictures should be at least 600x600 pixels in a square aspect ratio.
- Photocopied snaps are not acceptable.
- Digital photos must be free from dotted patterns or discernible pixels.
- The digital photo must be high resolution without grain, blur, or pixelation.
How to Use Pixelied’s USCIS Photo Tool?
Get USCIS passport photographs or visa photos quickly using Pixelied. The passport image tool eliminates the hassle and inconvenience by verifying your digital images on the spot and offering doorstep delivery.
Here is a step-by-step procedure to get your USCIS passport photo size using Pixelied:
Step 1: Take a Photo and Upload it
Snap a photo and upload it on Pixelied. You can also upload a previously captured image, but ensure that the picture is taken within thirty days.
Step 2: AI Image Processing
Once the photo is uploaded, Pixelied AI will process and adjust the image as per the USCIS picture requirements. It includes resizing your photo to 2x2 inches, changing the photo's background, and adjusting the image per the required photo dimensions related to eye level and head size.
Step 3: Download the Digital Photos
You can download the digital photo once the image has been processed and corrected. Users can download the passport picture after paying the photo service fee.
Step 4: Place Order for Printouts
Instead, you can also order the printed version of your photos from Pixelied. The option lets you receive the images from the comfort of your residence. You need to specify the number of copies and give address details to avail the delivery service.
The process takes less than 3 minutes; printed photographs are delivered within a few days.
Note: Pixelied is not an acceptance facility for passport applications.
How Do I Take a USCIS Photo with a Smartphone?
Only those applicants who reside overseas need to submit photos with the Naturalization application. To take a USCIS photo with your smartphone, follow these technical requirements:
- Choose a Place: To take USCIS photos, choose a suitable area within your home with a white or off-white background. The chosen location should have a good lighting resource, preferably daylight. There must not be any shadows in the frame.
- Set Smartphone on a Tripod: Set your phone on a tripod stand and switch on the timer to click photos with the back camera. You can also ask any family member or friend to click your pictures. Selfies are not permissible. The image must be in color. Take photos with a full-face frontal view with the head centered in the frame.
- Photo Dimensions: The size for the USCIS photo is 2x2 inches. Either take an image of this standard size or click a picture of any size and then adjust it using the USCIS photo cropping tool.
- Photo Printing: Once you click a good photo, print it on glossy photo paper. The picture should not be retouched or enhanced.
Note: If you’ve undergone significant facial surgery, gender transition, or weight loss, you must take a new photo for your USCIS application.
How to Print USCIS Passport Photos?
To get a print of your USCIS passport pictures, visit any nearby photography studio, and then:
- Select a nearby print shop in your area. You can also visit a nearby pharmacy, post office, or convenience store.
- Copy the digital image on a USB drive and bring it to the shop. Instead, you can transfer the image file to the shop’s system by connecting your phone.
- Ask the staff to print a photo with a glossy finish on thin paper.
- The photo dimensions should be 2x2 inches.
- Pay for the service and get your photos for submission with the N-400 form.

Take USCIS Passport Photo Online
Bidding farewell to the days of queuing for USCIS photos, Pixelied introduces an accessible and cost-effective solution. With Pixelied’s USCIS photo tool, delivering quality pictures to your doorstep is streamlined. Simply upload your photo and let our AI-driven tool work its magic, adjusting and refining your image to comply with USCIS requirements.
Frequently Asked Questions
USCIS is very strict about passport picture requirements. Your photos must meet the size, face view, eye level, head dimensions, background, print specifications, headgear, and glasses requirements. All the guidelines mentioned above must be fulfilled while taking a USCIS photograph.
To take a 2x2 photo for USCIS, find a well-lit area with a plain white or off-white background. Position yourself directly facing the camera with a neutral expression, eyes open and mouth closed. Remove any headwear or accessories that may obstruct your face. Ensure your entire face is visible without shadows or glare. Use a suitable camera held at eye level and frame the photo to include your head and shoulders. Once captured, ensure the picture meets the specific citizenship photo requirements, such as size, resolution, and other guidelines.
Write your name and A-number (Alien Registration Number) on the backside of the photos with a light pencil. Do not damage the picture while writing.
A picture that does not meet the requirements of USCIS photos gets rejected. The size of the photo should be 2x2 inches. The image should have a full face, front view, and head centered. The printed photograph should have a glossy finish. All other citizenship application photo requirements should be followed to avoid rejection by authorities.
You need to label your photographs by mentioning your full name and Alien Registration number on the back of your USCIS photos. It is done to ensure that the pictures are not misplaced easily. Remember, don’t use a sharp pen or write in a way that damages the images.
The photo size for USCIS is 2x2 inches (51 x 51 mm). The head position in the photograph should be between 1–1 ⅜ inches (25 – 35 mm) from the crown of the head to the bottom of the chin. The eye level should be set between 1 ⅛ –1 ⅜ inches (28–35 mm).
Yes, but while there are some similarities, there are also distinct differences between the two sets of requirements. It's essential to adhere to the specific guidelines for each application to ensure that your photos meet the necessary criteria. For example, passport pictures must be 2x2 inches in size, have a white or off-white background, and meet specific composition and facial expression guidelines. On the other hand, USCIS photos have the same size, background, and color requirements. However, USCIS requires specific information or markings on the back of the photo. Therefore, it's crucial to carefully review and follow the U.S. Department of State guidelines for passport images and the USCIS for their application-specific photo requirements.
Only those applicants who reside overseas need to attach photos for the N-400 form. They need to submit two identical color photographs of themselves labeled with their name and A-number on the back of the images.
You must submit two identical photographs (in case you’re not a US resident), a permanent resident card copy, a money order or check for the naturalization fee, documents for legal marital status, and military service evidence with the Naturalization (N-400) application.
You must attach two identical 2x2 inch photographs with the Naturalization (N-400) form. The requirement is only for those applicants who reside overseas and are applying for Naturalization.